


Stylish Wood Flooring Transitions for 2022
Advice | May 18, 2022
![2. Stainless steel trim detail - Timber to carpet transition (Flooring featured: Smartfloor Coral Oak [now discontinued])](https://forte.co.nz/image/cache/catalog/imported-images/IMG_5293edit-890x592.jpg)


a-890x592.jpg)


The transition of wood flooring to other surfaces is quite common in New Zealand homes, especially where the use of room differs. In high traffic areas such as entrances, living rooms, kitchen spaces and dining areas, hard floor coverings are often used as they are more practical, durable and hygienic, whereas carpets are preferred in bedrooms and hallways for warmth and comfort.
Given the different flooring needs, it is important to consider the types of flooring transitions you may want use when transitioning your wood flooring to another floorcovering in your home – get these details right and you’ll end up with a sophisticated looking floor.
Below we’ll walk you through a number of different flooring transitions and the look you can achieve with each one.
Before you start
Flooring surfaces always look best when they are level and meet at the same height. To rule out any height variances we recommend planning this with your builder, architect, designer and flooring installer in the early stages of your project. They will be able to discuss different options and products that can be used in achieving a flush look.
For example, a ramp can be used when transitioning to carpets with a slight difference in height and a reducer can be used when there is a larger height variance.
You will notice that we recommend the use of ‘caulking’ as opposed to silicone in the below information. The reason for this is that when it comes time to apply a maintenance coat to your wood floor, caulking will take to the coating whereas the silicone will repel it.
Wood flooring to carpet
Wood to carpet transitions are commonly used in bedrooms and hallway entrances, with a recent trend of carpet inserts to living areas becoming more popular.
A transition that looks stylish, and one that we recommend, is transitioning with an insert to protect the edge of the timber. This can be done using a flat bar.
Flat bar insert
Not only is a flat bar used to give the transition a professional finish, but it is also used in high traffic areas where there is going to be a lot of foot traffic, rolling furniture or heavy objects moving over the transition is a wise idea.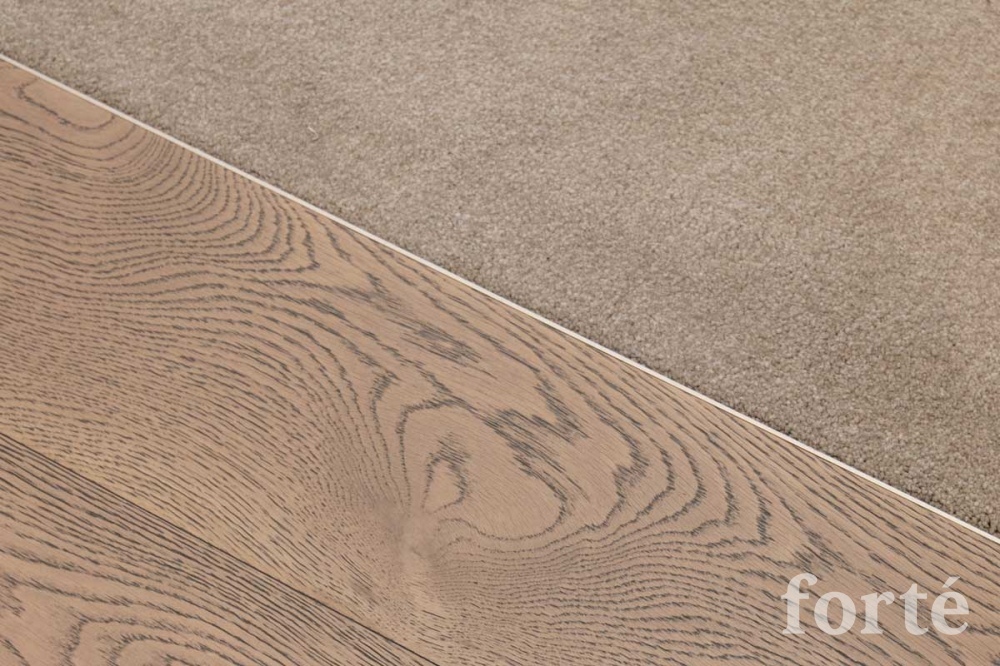
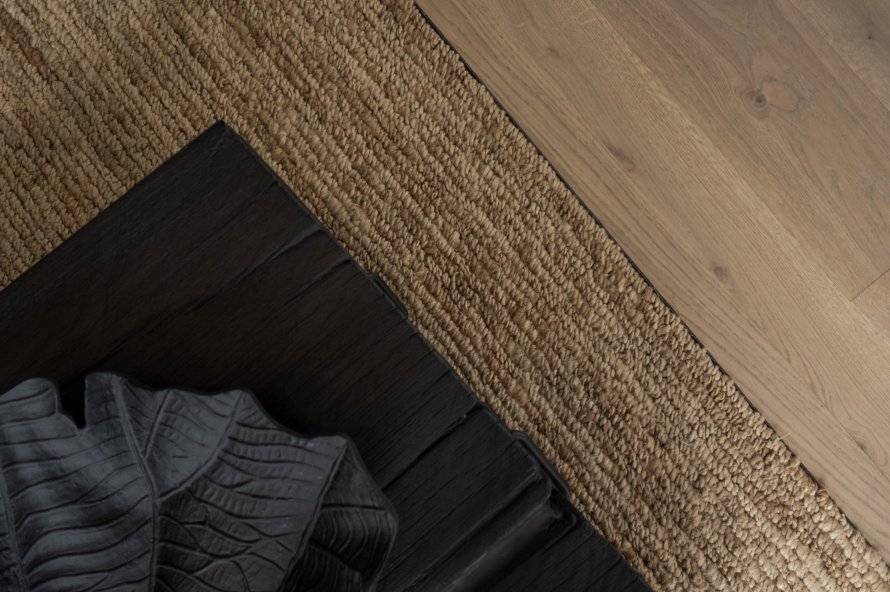
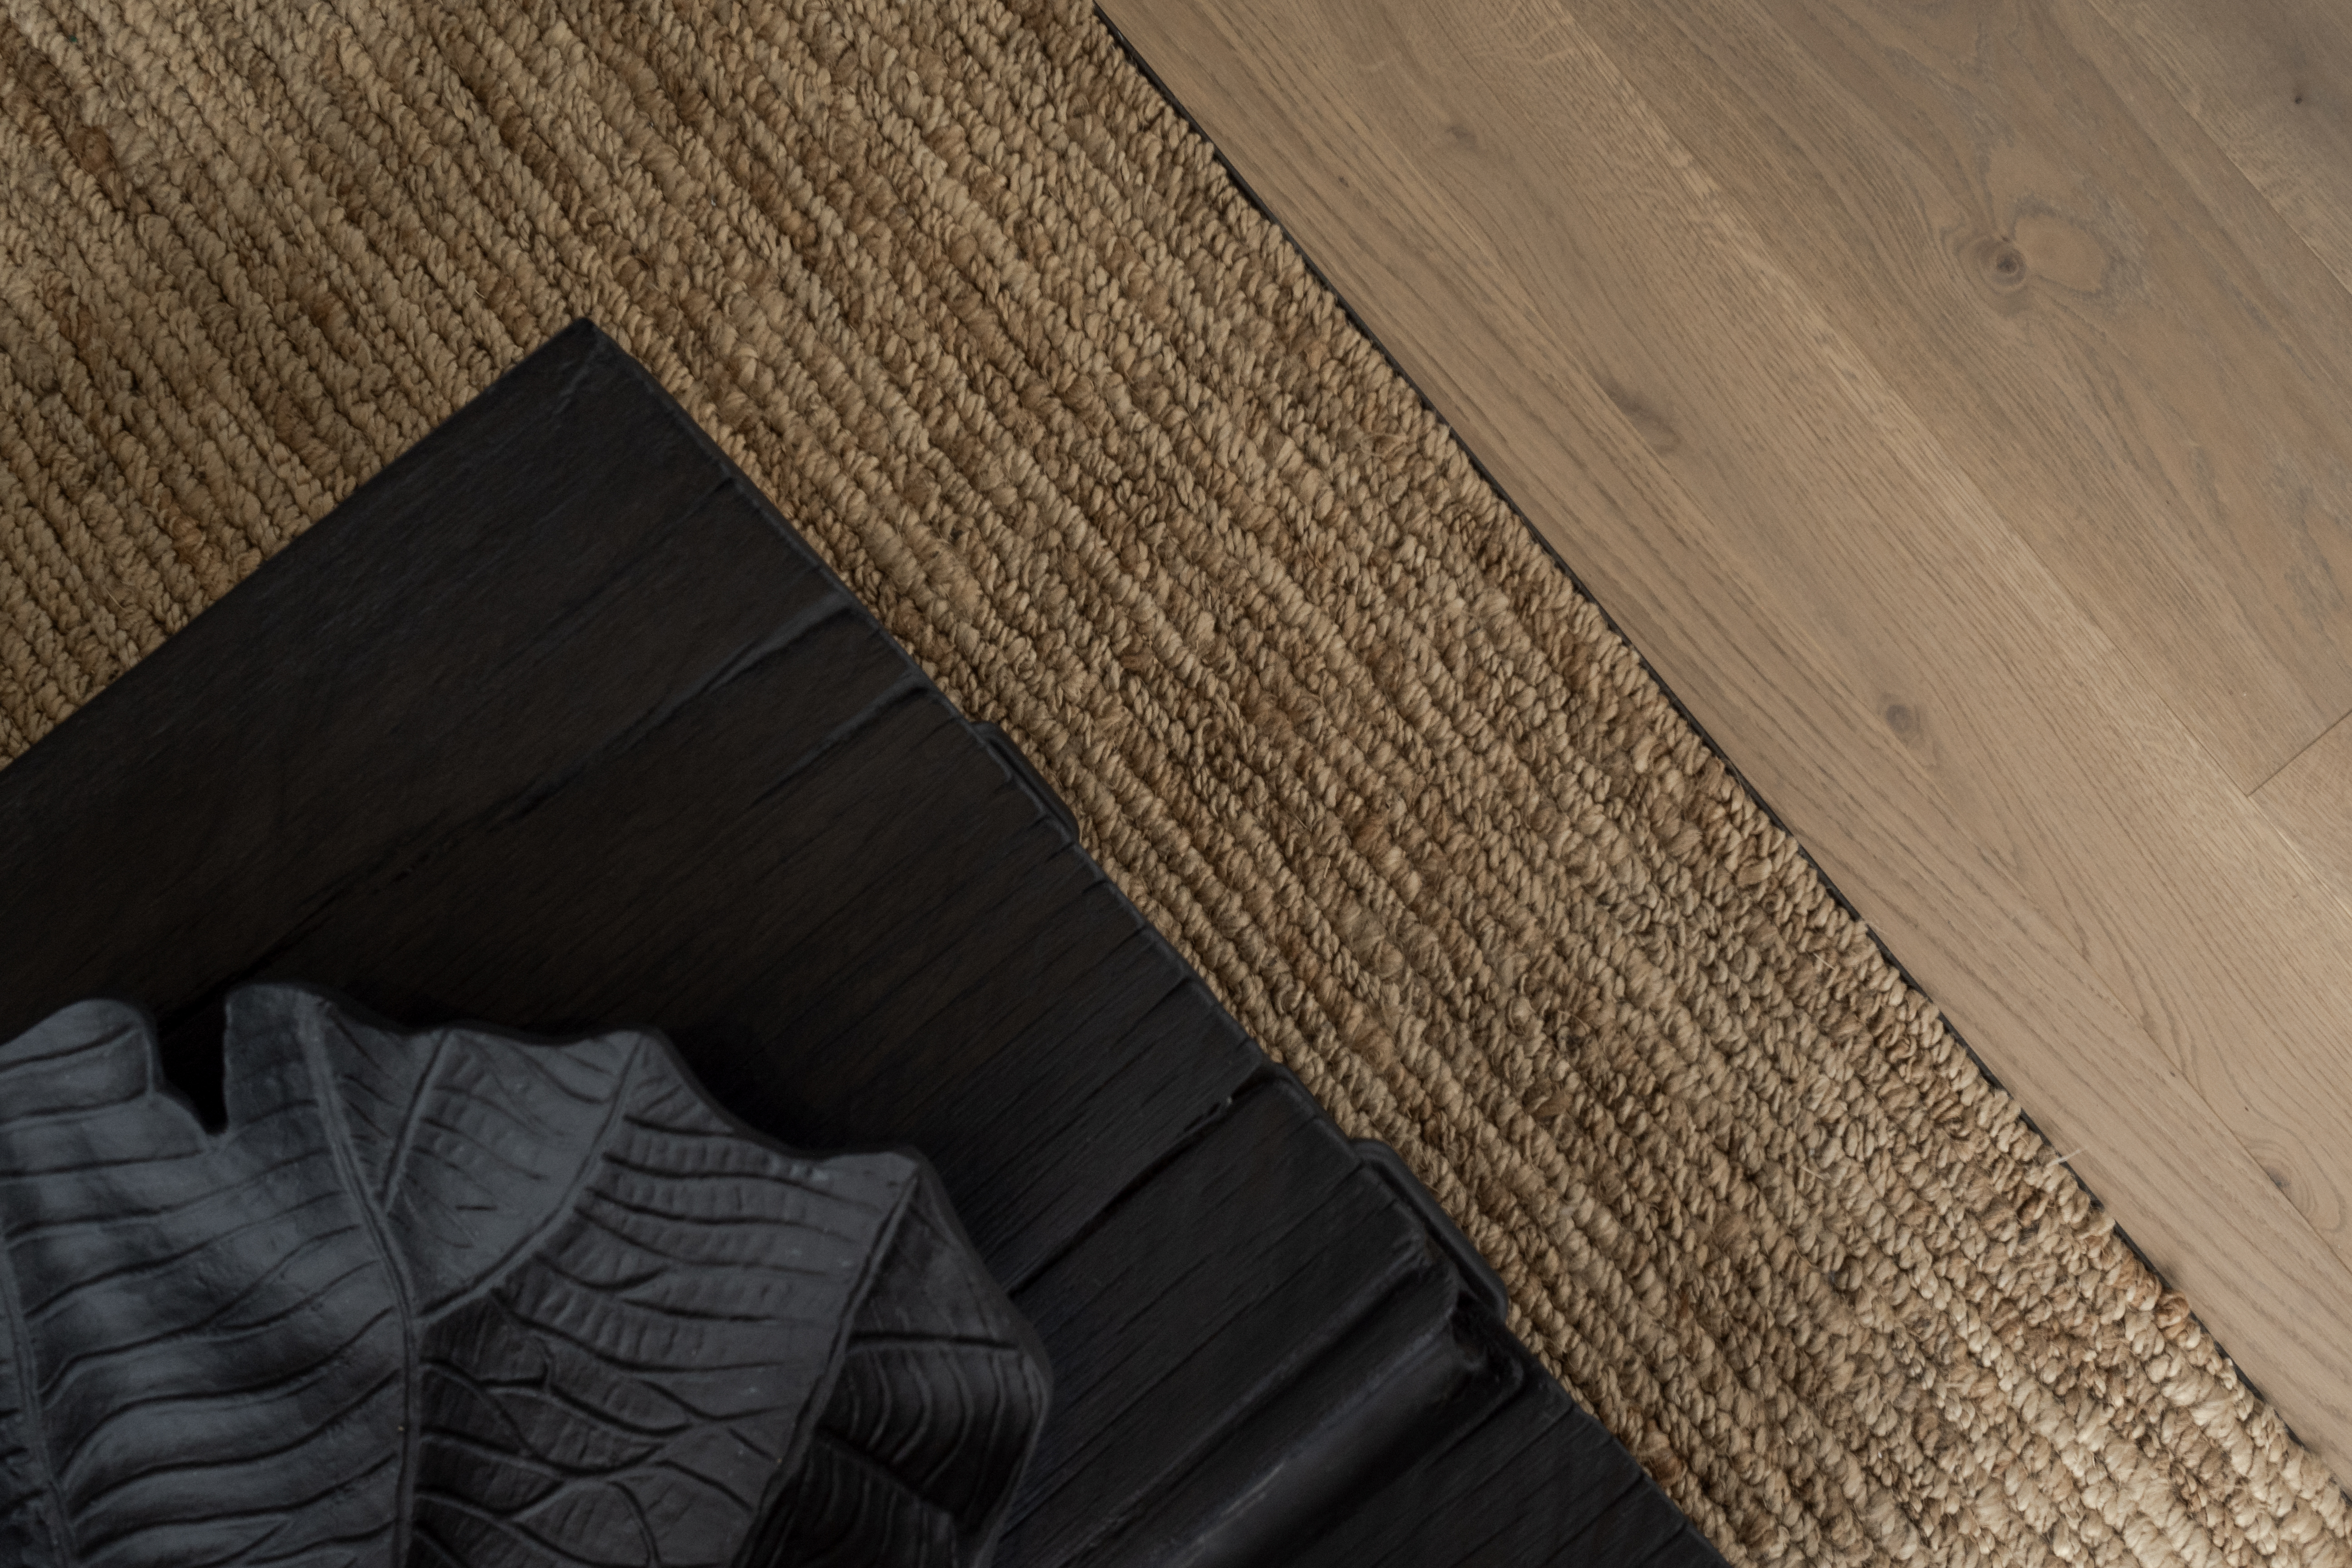
We also recommend installing the flat bar around carpet inserts that are inlaid into the wood floor such as the below adonised black flat bar with wood flooring and carpet insert.
HOw does the flat bar protect the timber?
When there is traffic moving between the carpet and wood flooring, the carpet often compresses and leaves the edge of the wood floor exposed and susceptible to chipping or splintering. When the flat bar (usually brass or aluminium) is installed along the edge of the timber it creates a protective edge for the wood, which reduces the risk of damage.
Wooden threshold insert
Another popular way to transition from wood flooring to carpet is by using a wooden threshold. A wooden plank is turned into a threshold, running against the end grain, giving a neat and professional finish for those who don’t necessarily like the look of the flat bar. The wood threshold, just like the flat bar, will protect the edge of the planks from any wear and tear, however we still recommend using a flat bar as it offers more protection than a wood threshold.
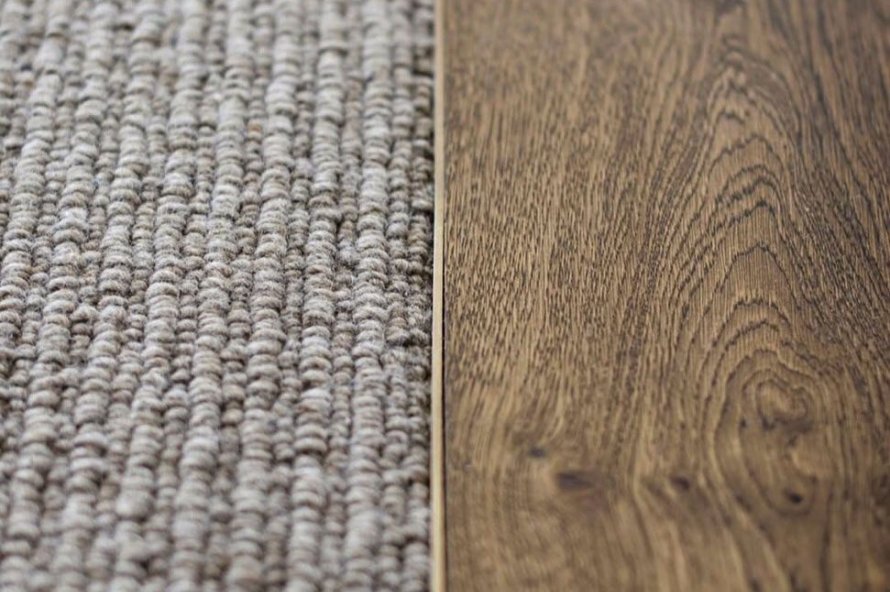
With no insert
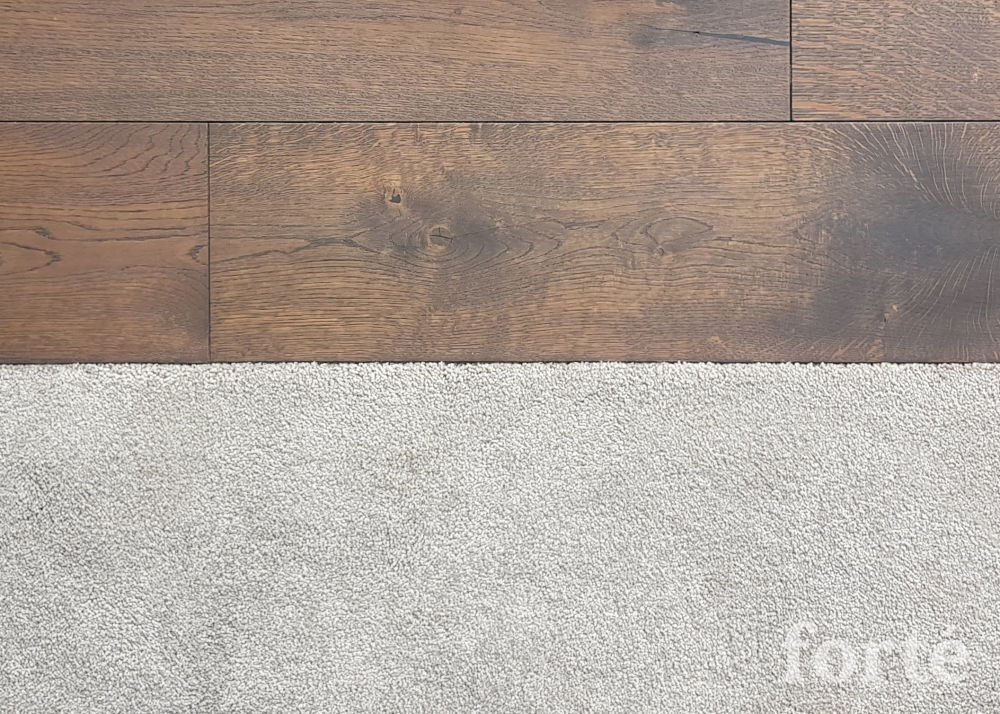
Although less common, it is also possible to transition your wood flooring to carpet with no flat bar. If this installation method is used it is imperative that the carpet height is set correctly and accurately by your carpet installer at 4mm above the wood flooring, as once the carpet settles the edge of the timber has no protection and may result in chipping from heavy traffic.
Wood Flooring To Tile
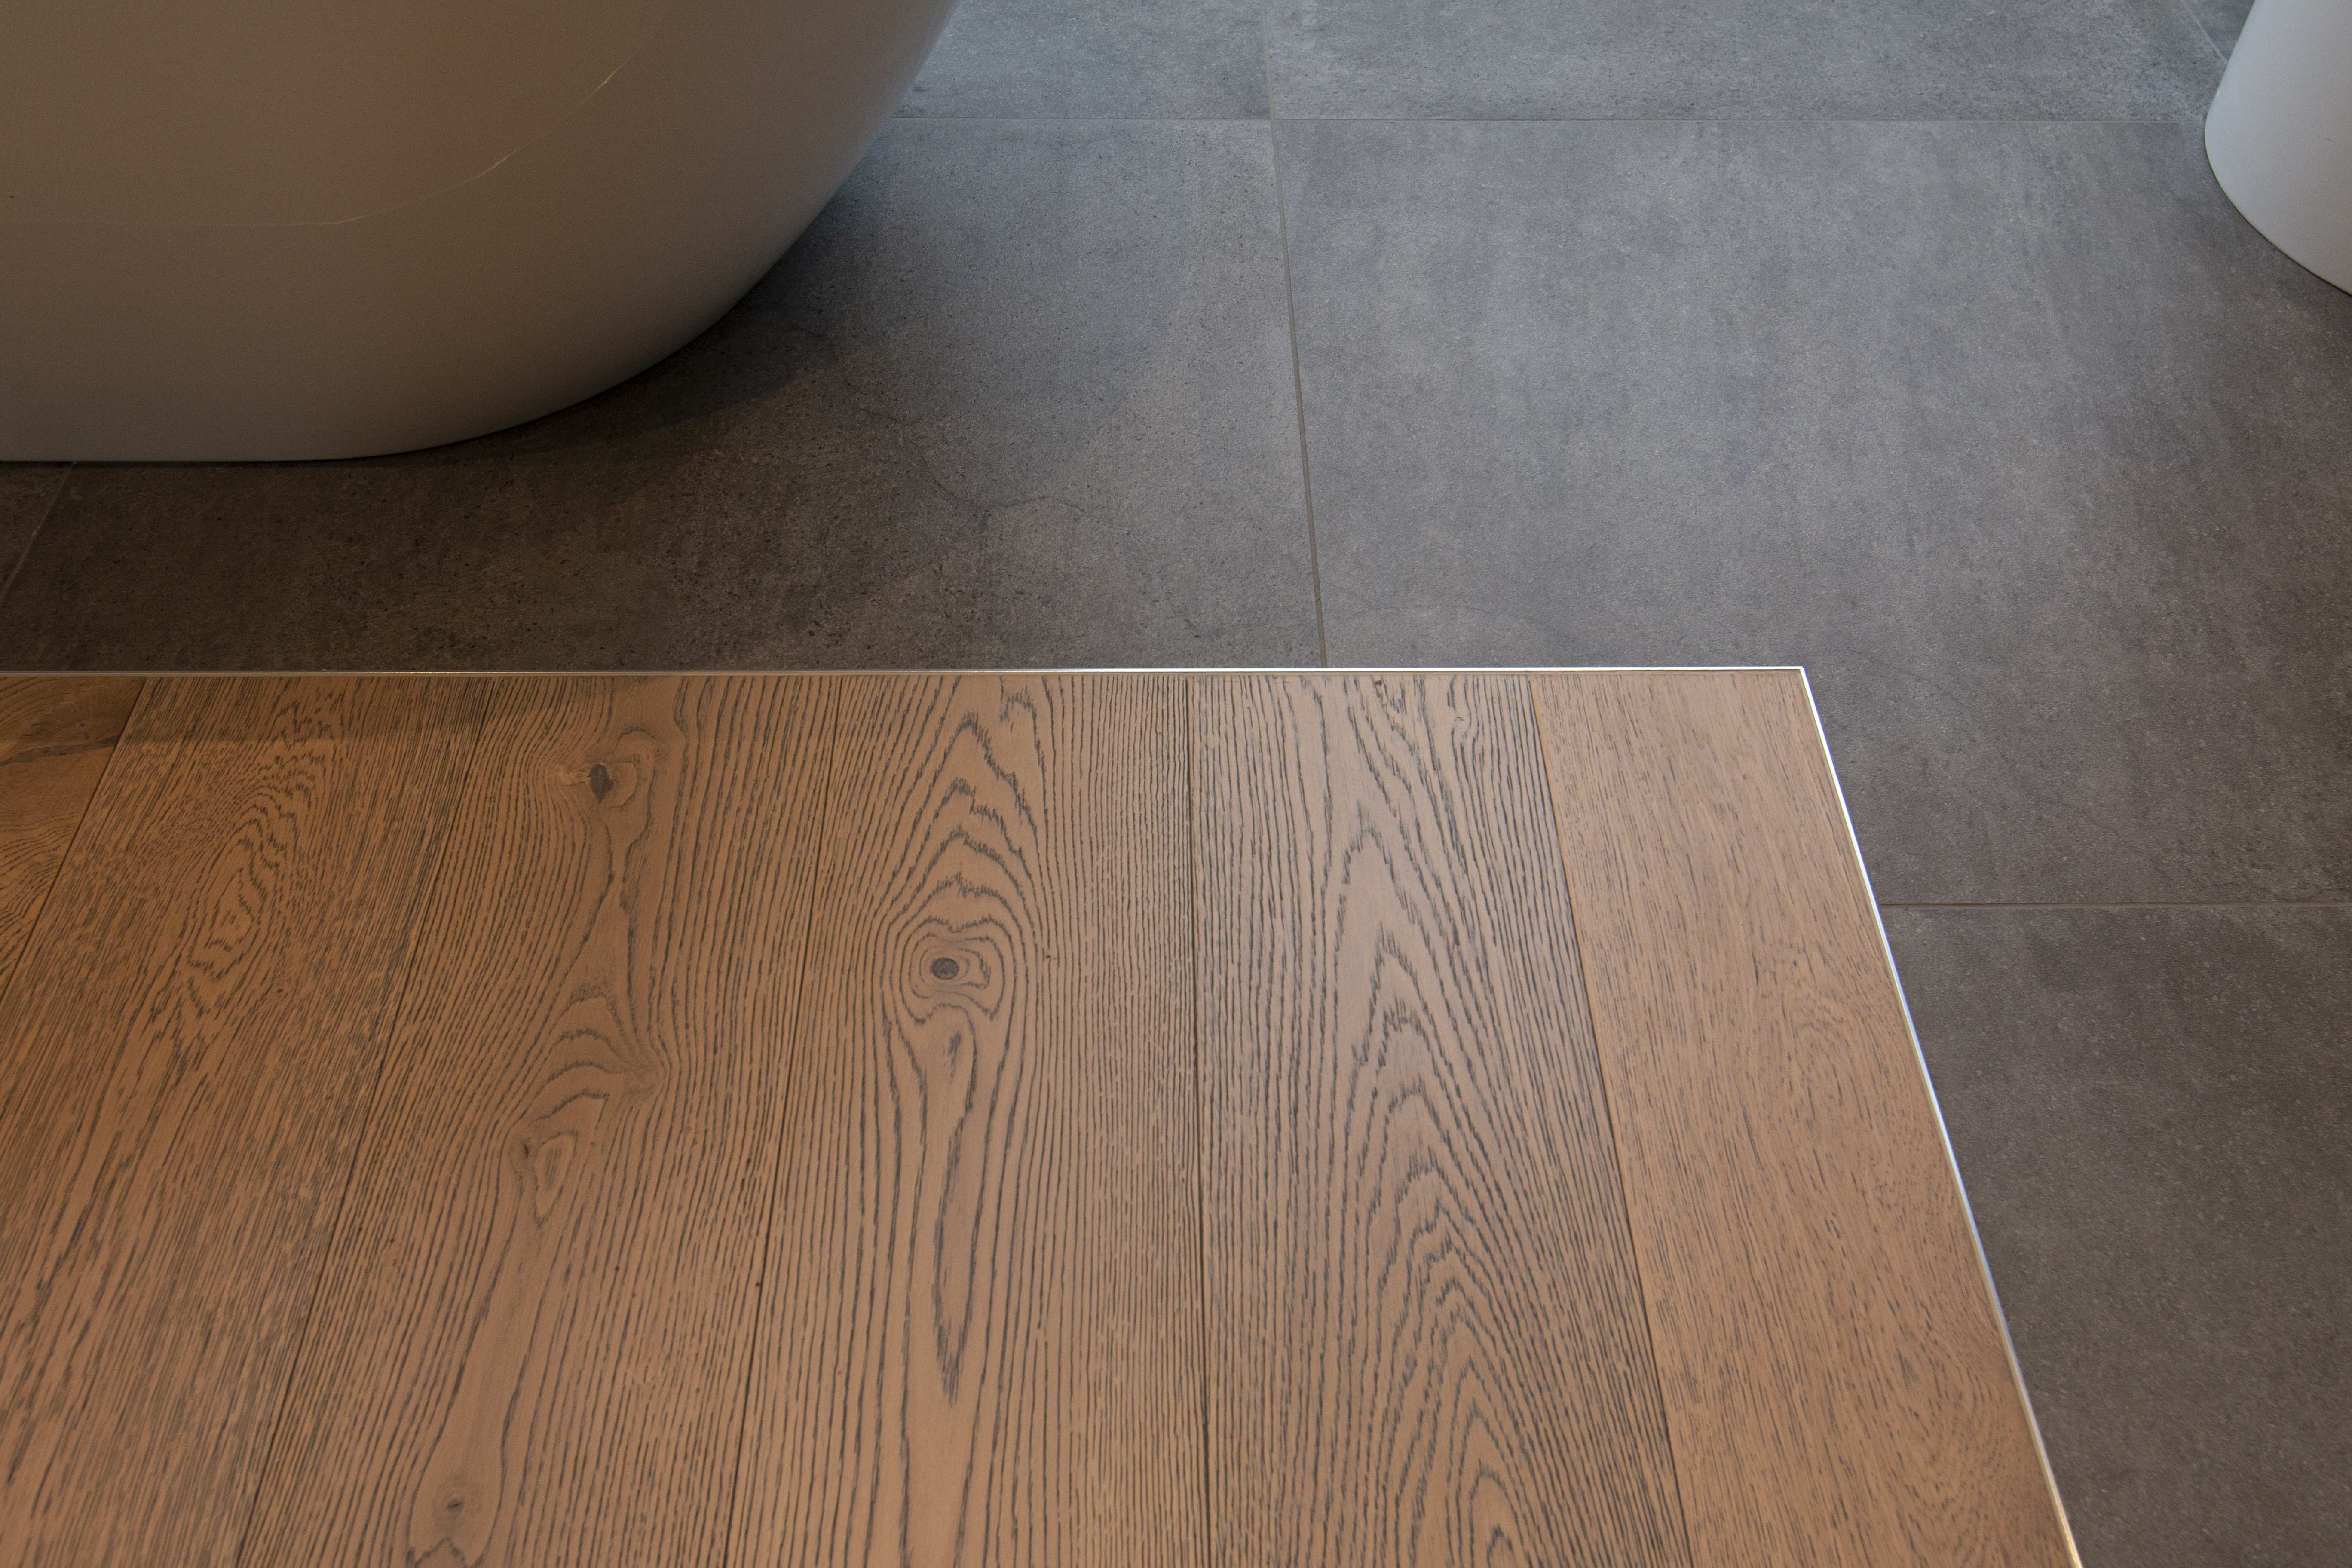
When it comes to bathrooms and kitchens, the wood flooring to tile transition is quite common as a lot of people tend to prefer tiles in a wet area.
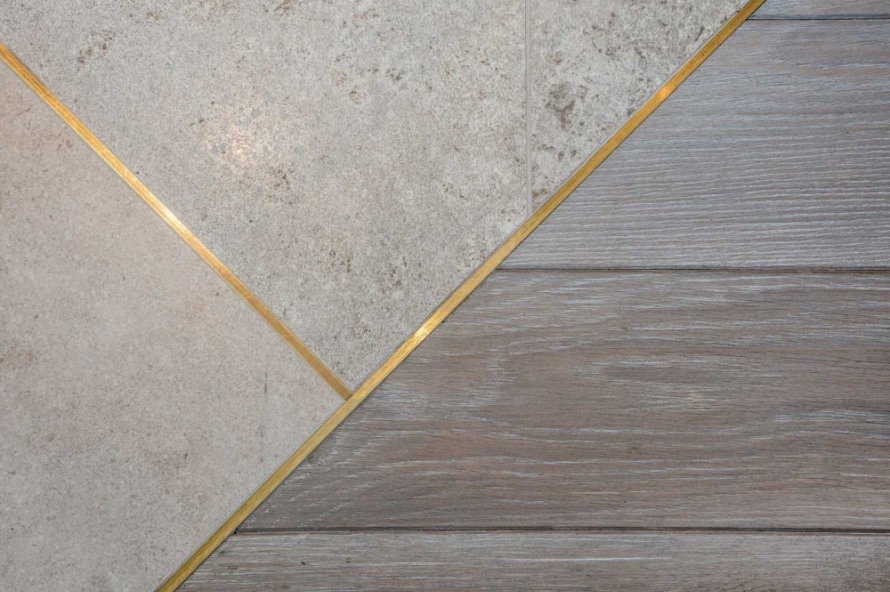
Tile bar and caulking insert
While flat bars are often used when transitioning to carpet, transitions between wood flooring and tiles should use a tile bar and silicone finishing. The tile bar is attached directly to the tile (not the wooden plank) and must be installed by the tiler prior to the wood floor being laid. For a timeless and understated look, your caulking colour should match either the tile bar or the colour of the wooden flooring.
Wooden threshold insert
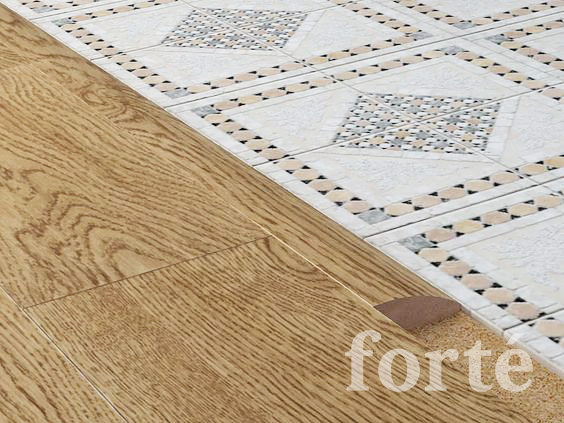
Another great way to tie in a wood floor area to a tiled area without the use of a tile bar is by installing a wooden threshold. Just like with a carpet transition, the threshold runs against the grain of the wooden planks and gives the floor a clean, professional finish all while protecting the edges of the wood. The threshold will also need to be finished off with coloured caulking.
Alternate transition method
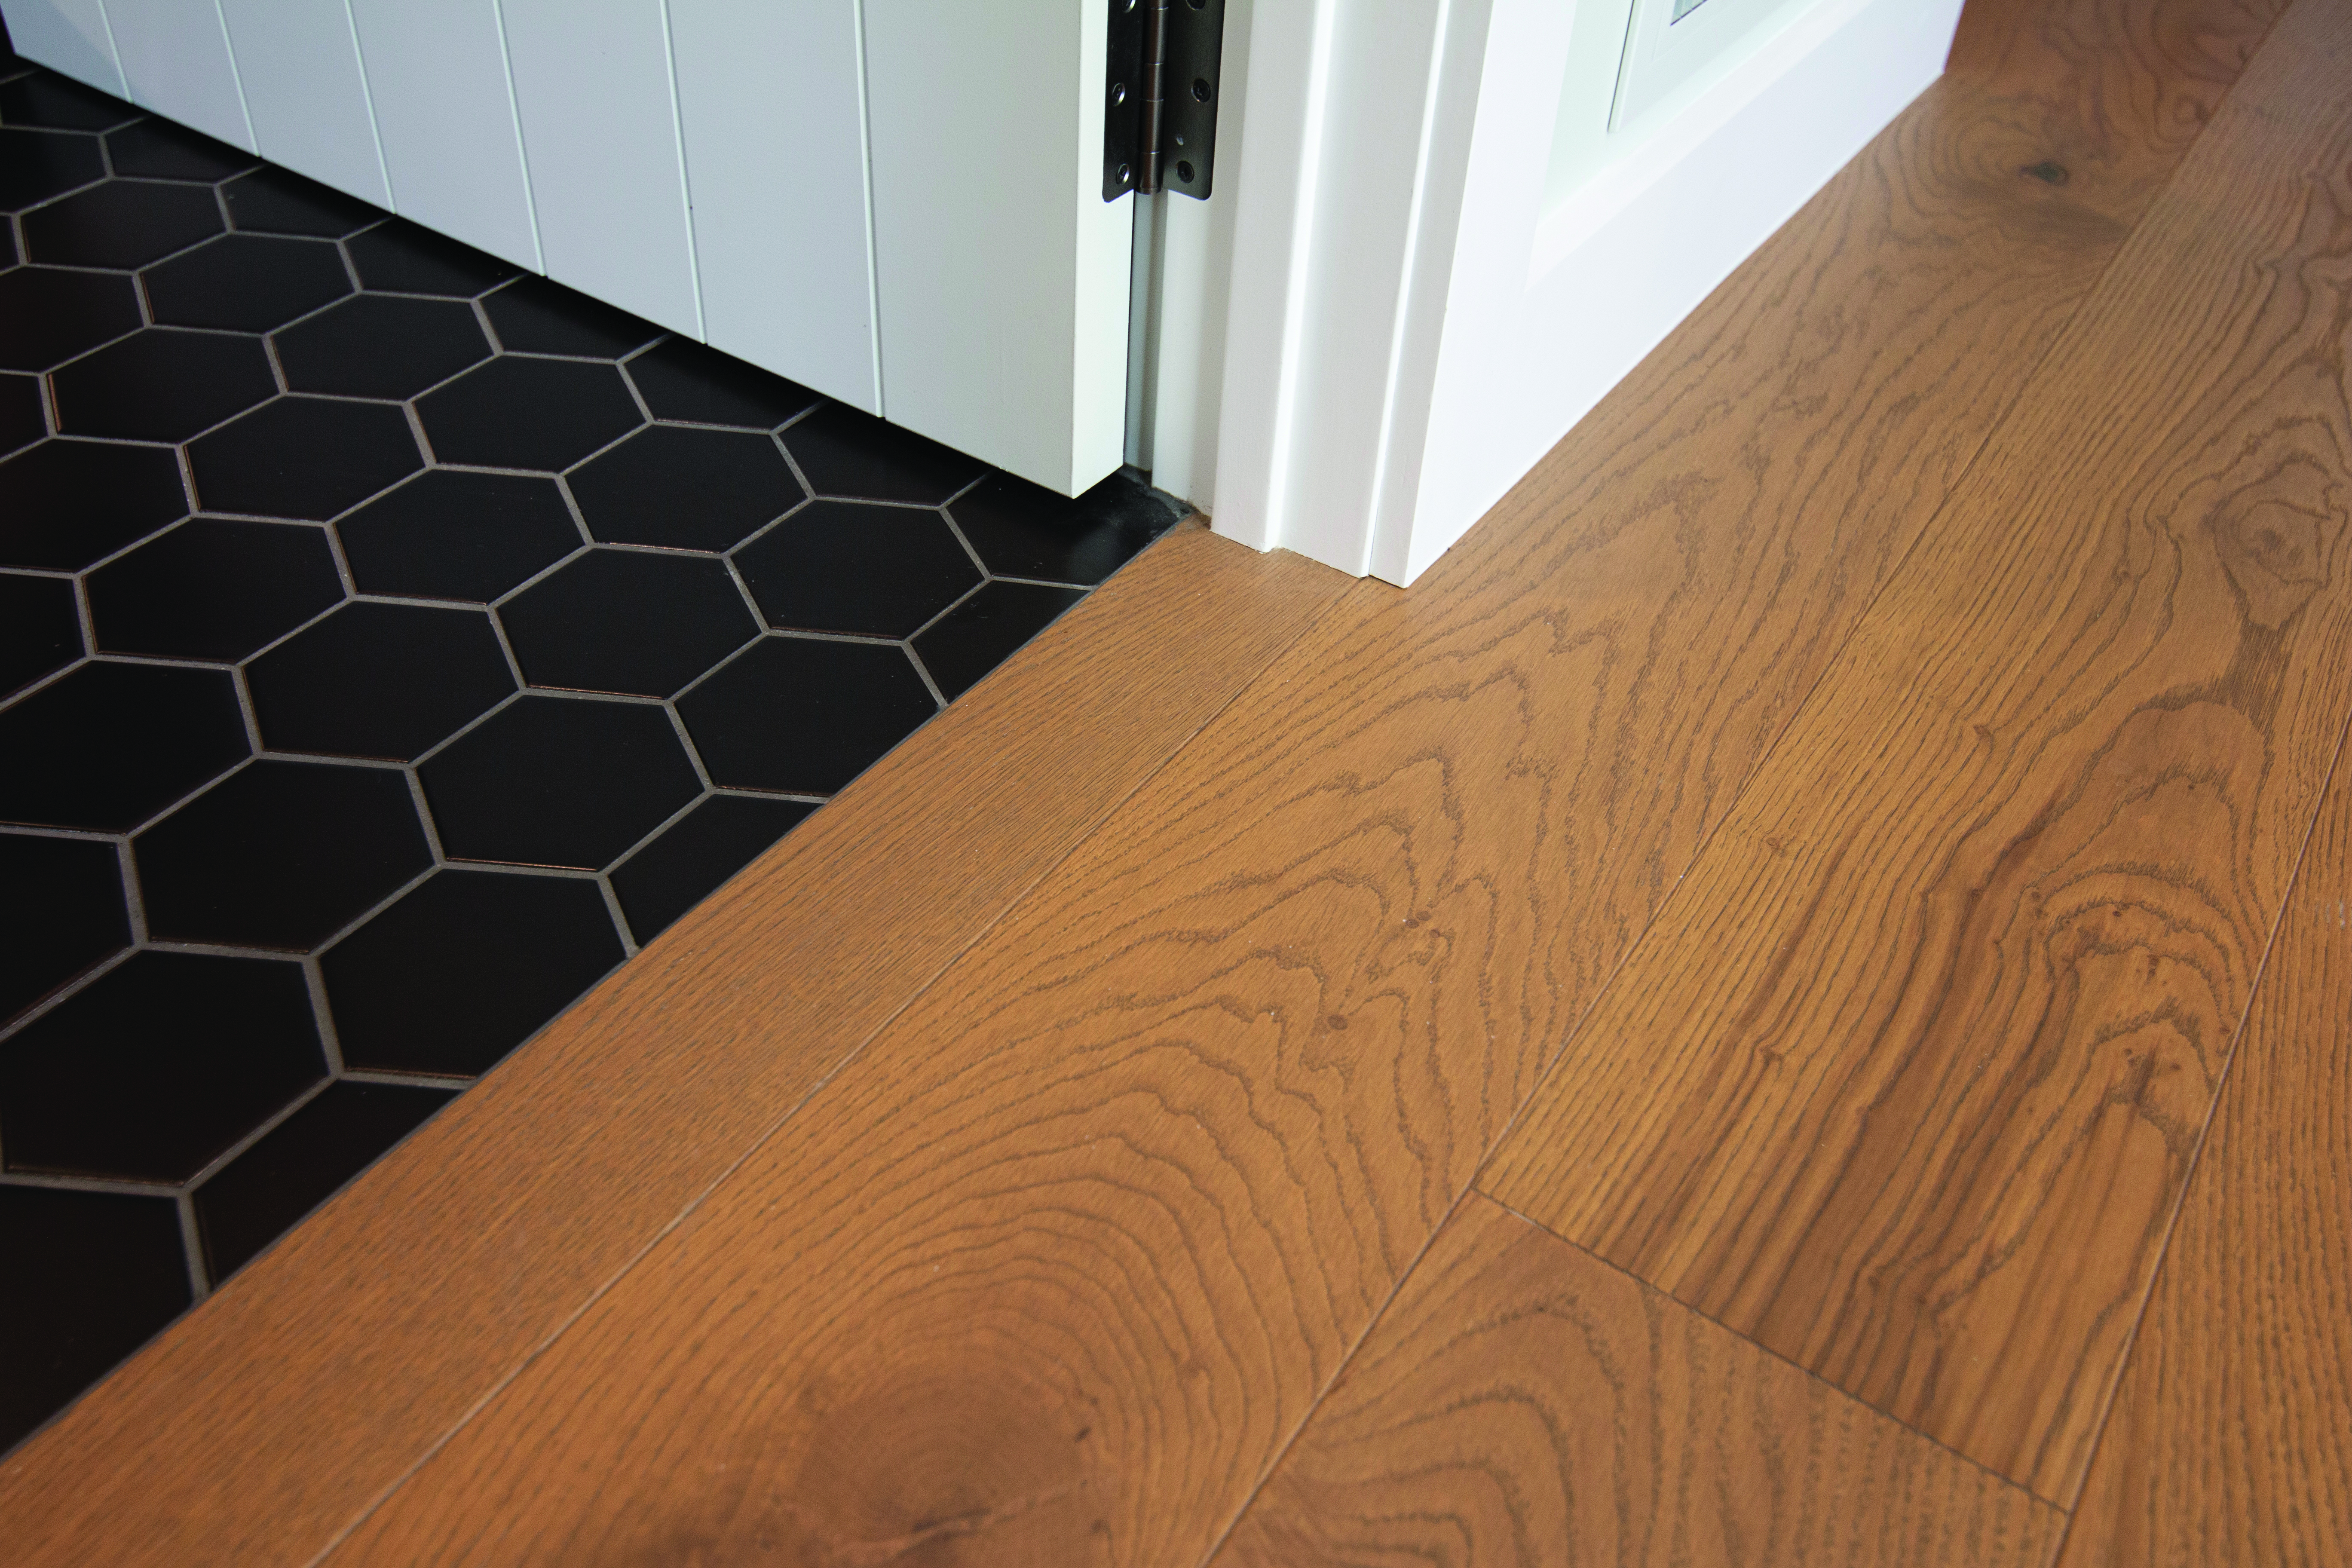
If you want a more unique flooring pattern when tying in a tiled area to wood flooring, you can choose to go with an irregular transition method. This trend is becoming more popular as it delineates certain areas without creating a usual straight line. For example, rather than cutting your hexagonal tiles to form a straight edge between the timber and tiles, you can interspace separate tiles into the wood floor, creating a gradual transition where the tiles are seen to lead the design.
This method is quite time consuming and will cost you more than that of a straight edge transition. Again, your tiles should be installed before the timber and your flooring installer must make sure there is enough space between the wood floor and tiles to allow for a caulking finish. For a polished and sleek look, the scaulking should match the colour of the wood flooring or the tile grout.
Another alternate transition method, and one that is quite a lot more expensive due to the time it takes for installation, is a curved transition. This method is less common, but can be achieved, and is also finished off with coloured caulking to give the affect of grout between the adjoining surfaces.
![]()
Wood Flooring to Polished Concrete/Garage Carpet
When choosing to transition from your wood flooring to a polished concrete floor (or garage carpet), it is important to remember that there will be a substantial height difference as your wooden floor boards are glued to the concrete that it is transitioning to. In this instance, speak to your flooring installer about using a reducer profile to create a smooth transition between adjoining surfaces.
In some cases, some products include reduce profiles in the range, such as our Moda Collection, which ensures a perfect colour match and optimum finishing quality – not to mention a way quicker job for your flooring installer.
Another option is having your flooring installer create a ramp out of the floor board being used which will ensure, once again, a perfect colour match. If this is not an option, then an oak reducer can be bought and stained to match the flooring.
Wood Flooring to Aluminium Joinery
Kiwis love great indoor/outdoor flow, and we often get questions about how to achieve a flush transition with between their aluminium joinery to their outdoor areas. Read on for advice on how to achieve this.
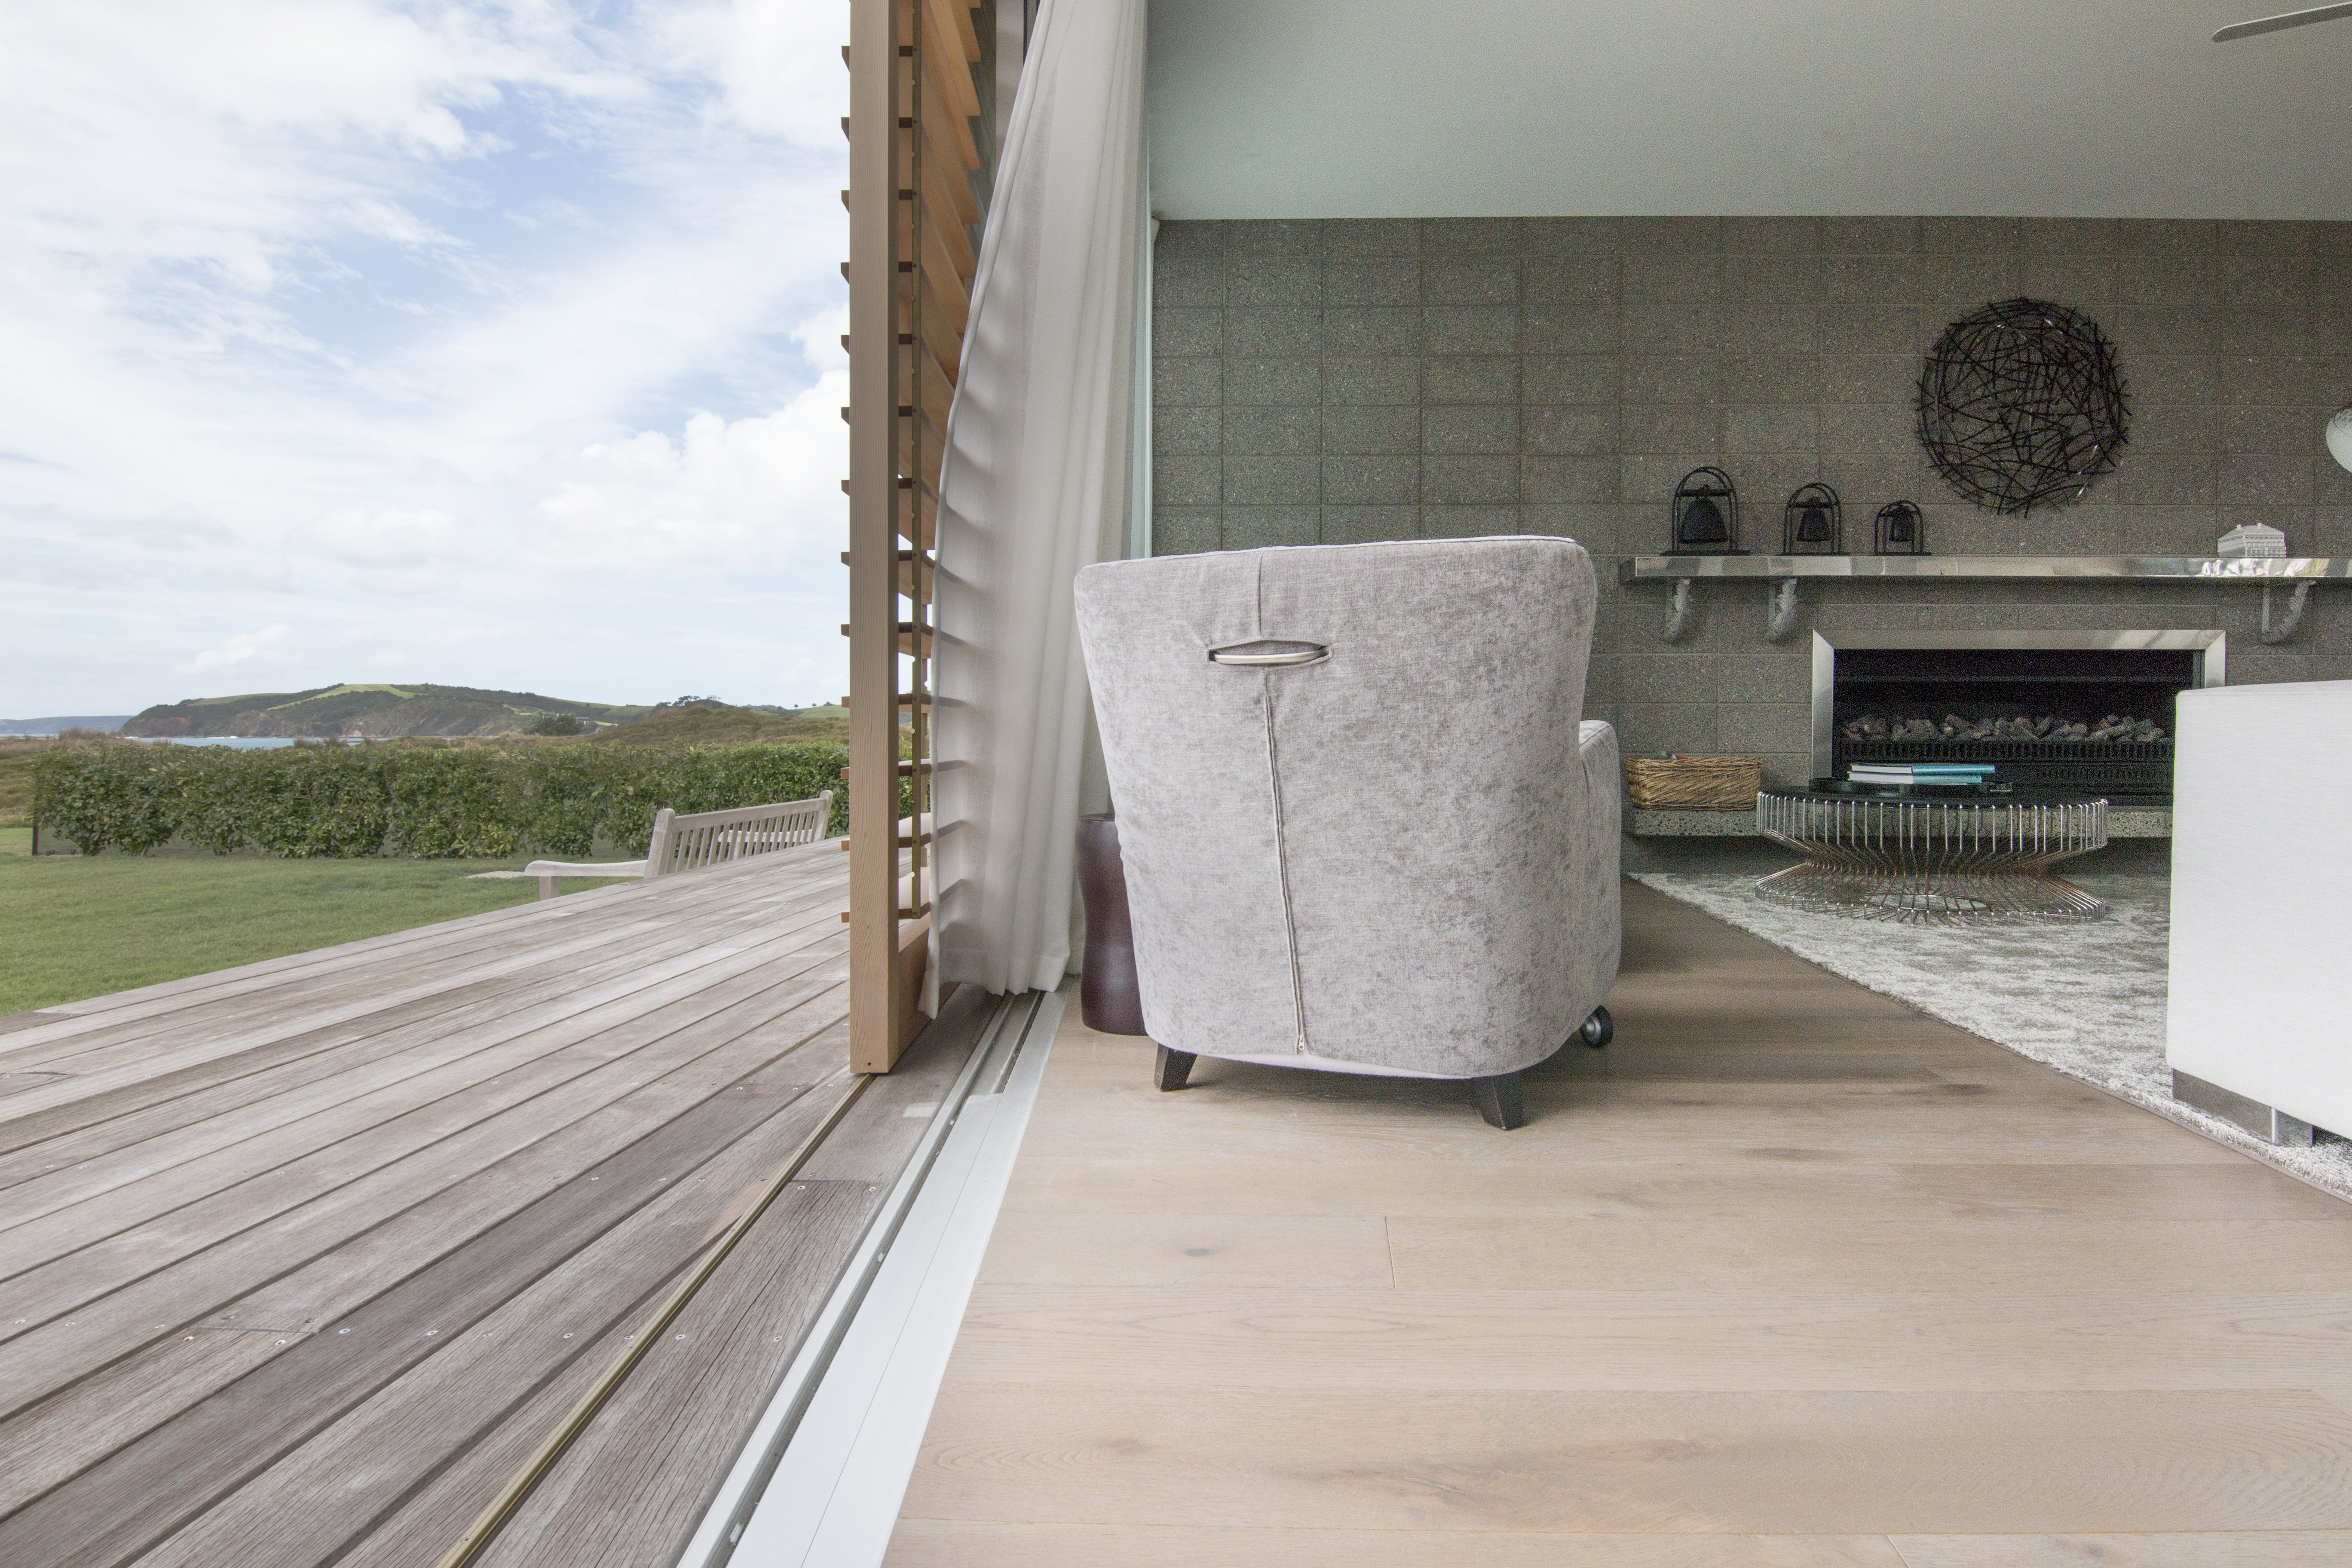
Ranch Slider with no angle trim
There are two ways you can achieve fluidity between your indoor flooring to your decking outside. We recommend using the method of a ranch slider transition with no angle trim, however this can only be achieved if the flooring/decking is level to the joinery on both sides or when the joinery sits above the flooring as pictured below. The flooring is then finished off with caulking to match the colour of the flooring or joinery.
Ranch Slider with angle trim
If the flooring level is higher or lower than the ranch slider threshold, then a 13mm angle trim will be necessary to protect the flooring edges from wear and tear. The angle trim is powder coated to match the colour of your flooring, creating a cohesive and understated look.
We recommend speaking to your builder or flooring installer about your options in creating a seamless flow from the interior of your home to the outdoor area to ensure the right choice is made for your space.
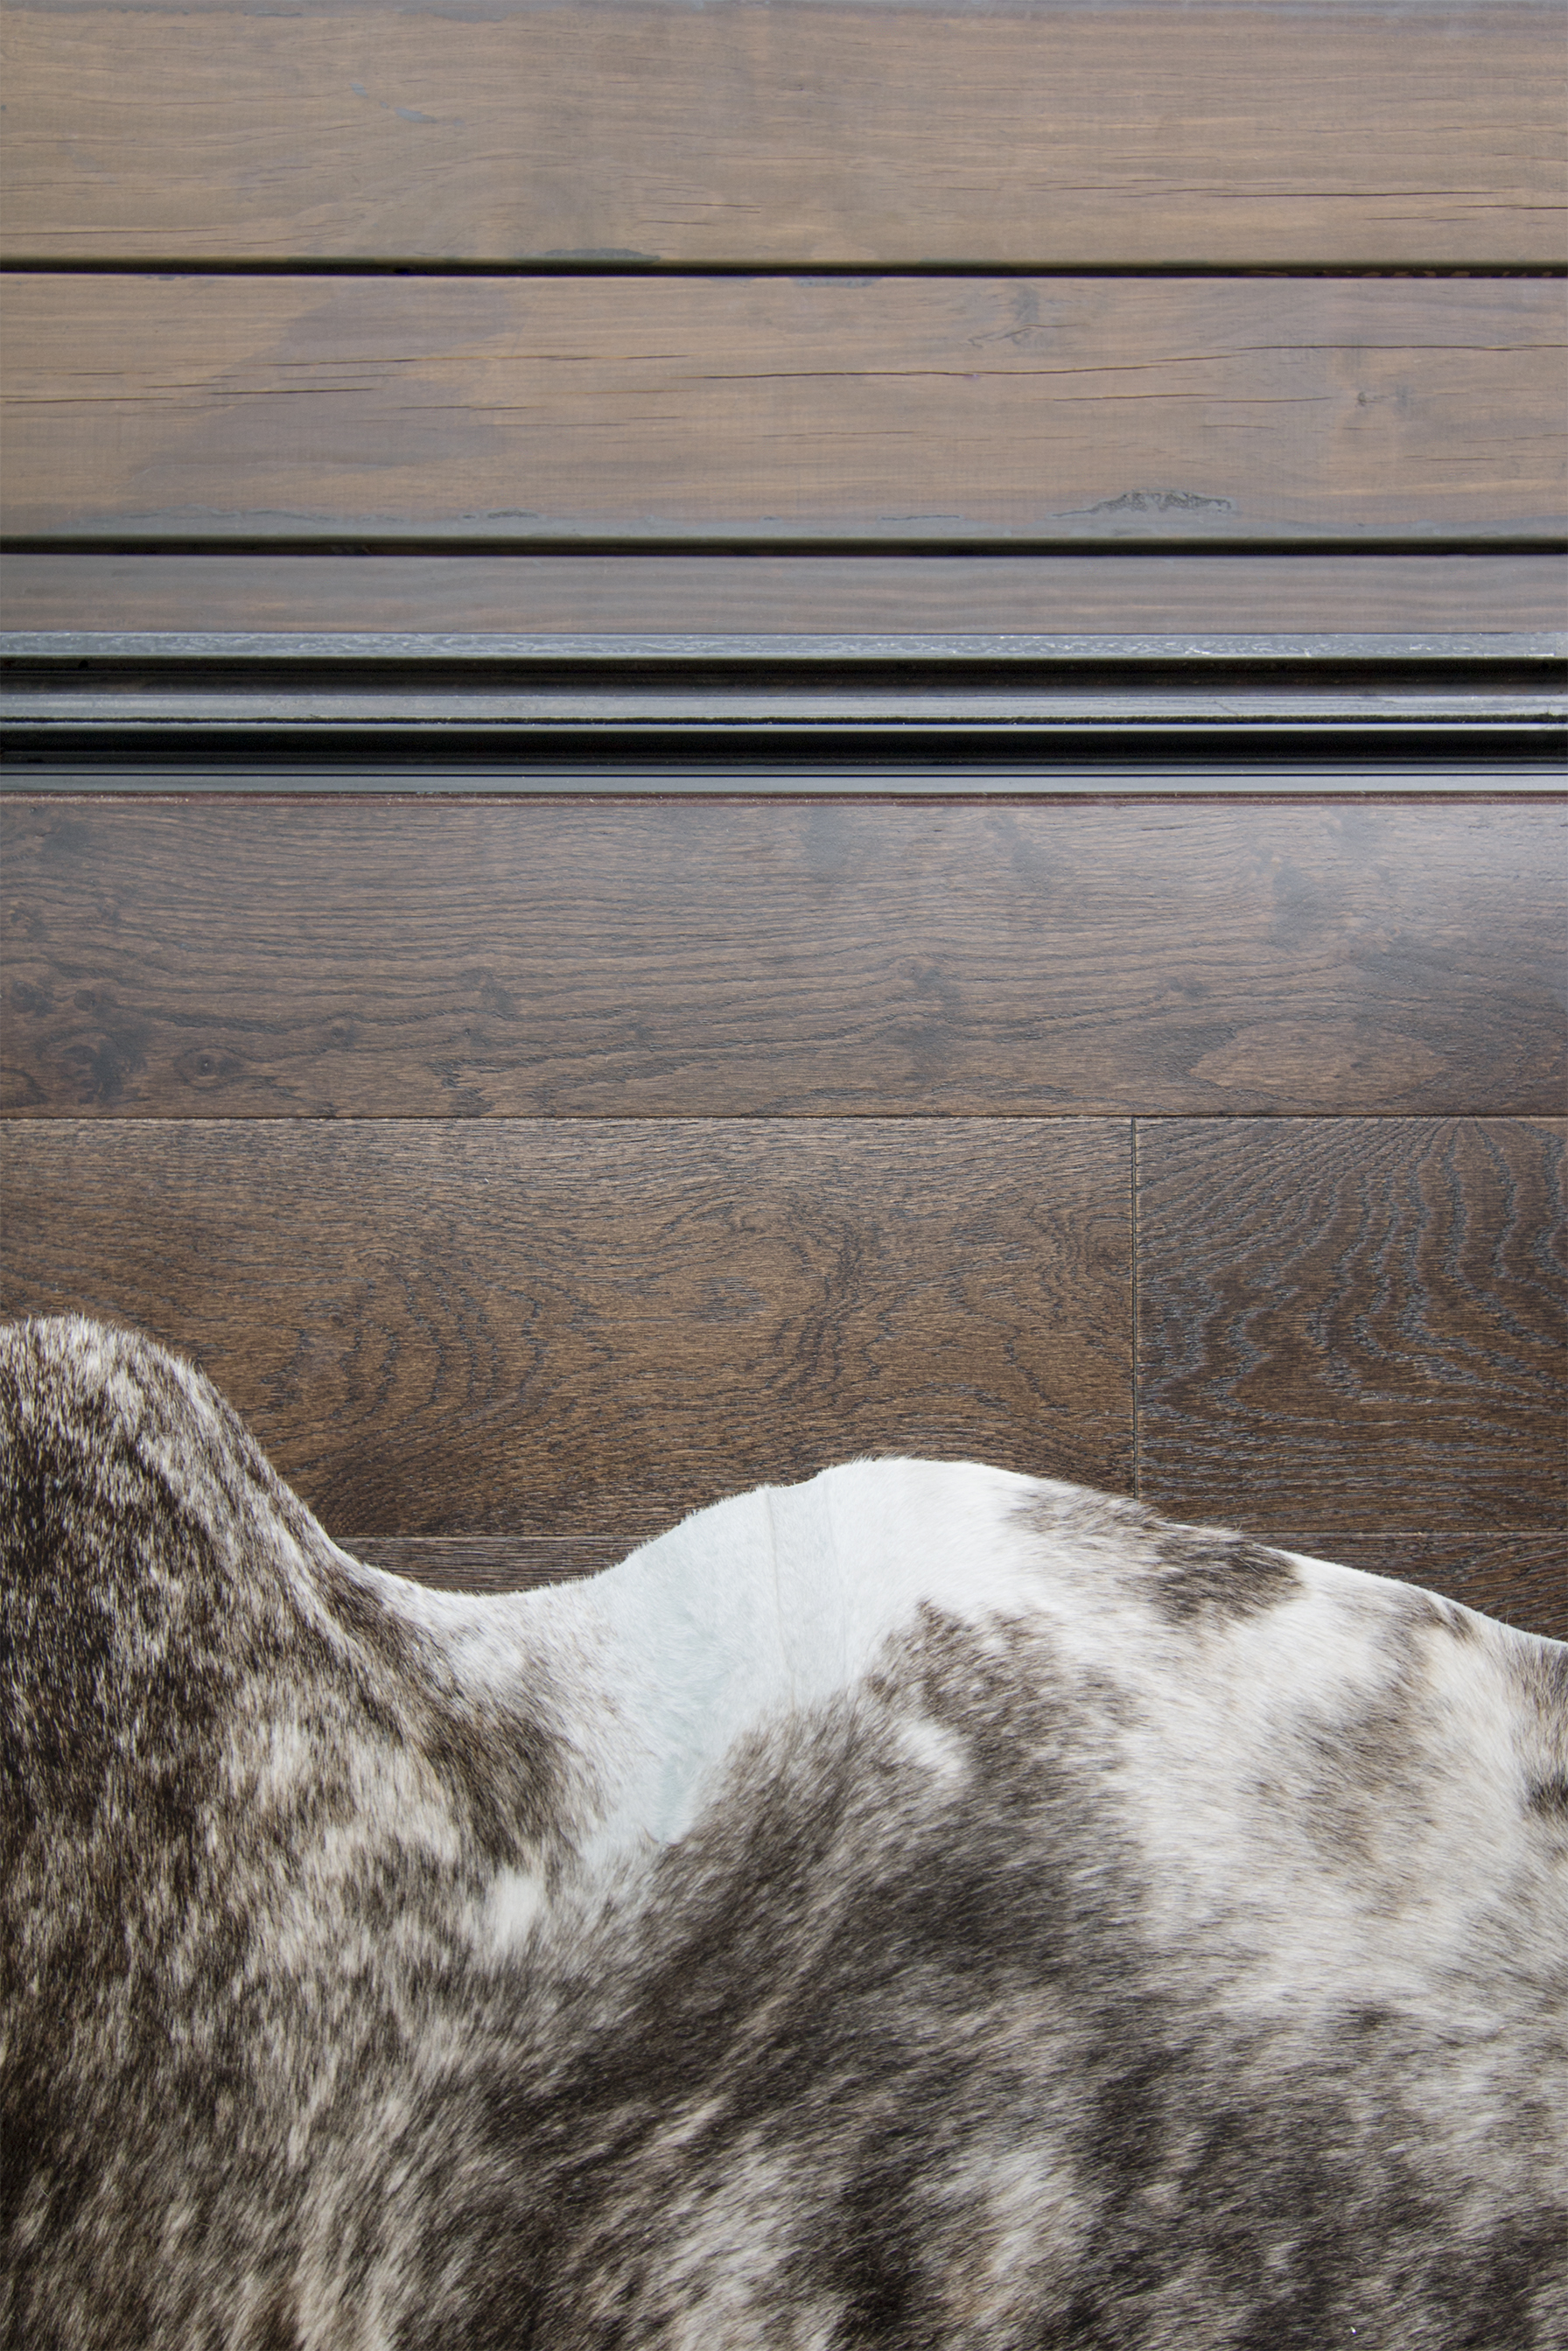
Wood Flooring to Front Door
Nothing is more inviting than opening up your front door to a beautiful wood floor entrance hall that flows seamlessly from the threshold. To achieve this you will need to make sure the transition from the front door to your wood flooring is done correctly.
When purchasing an external door, it will usually come with a sill attached, but can be bought without one. If the sill is attached, then we recommend removing it to allow your wood flooring to be installed right up to the threshold of the door. If this is not possible then the wood flooring will need to transition from the edge of the sill.
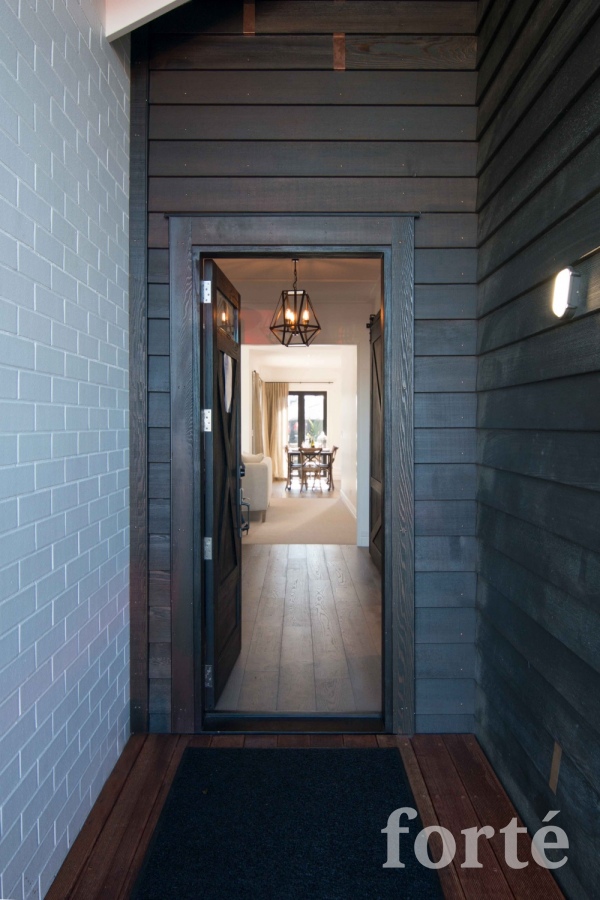
Front door with wooden sill removed
Our recommendation would be to get the front door sill removed, or purchase one without a sill, before having the wood flooring installed as it gives a more clean and professional look overall. The wood floor will need to be installed leaving a slight gap between the adjoining surfaces and finished off with a coloured caulking that matches your flooring.
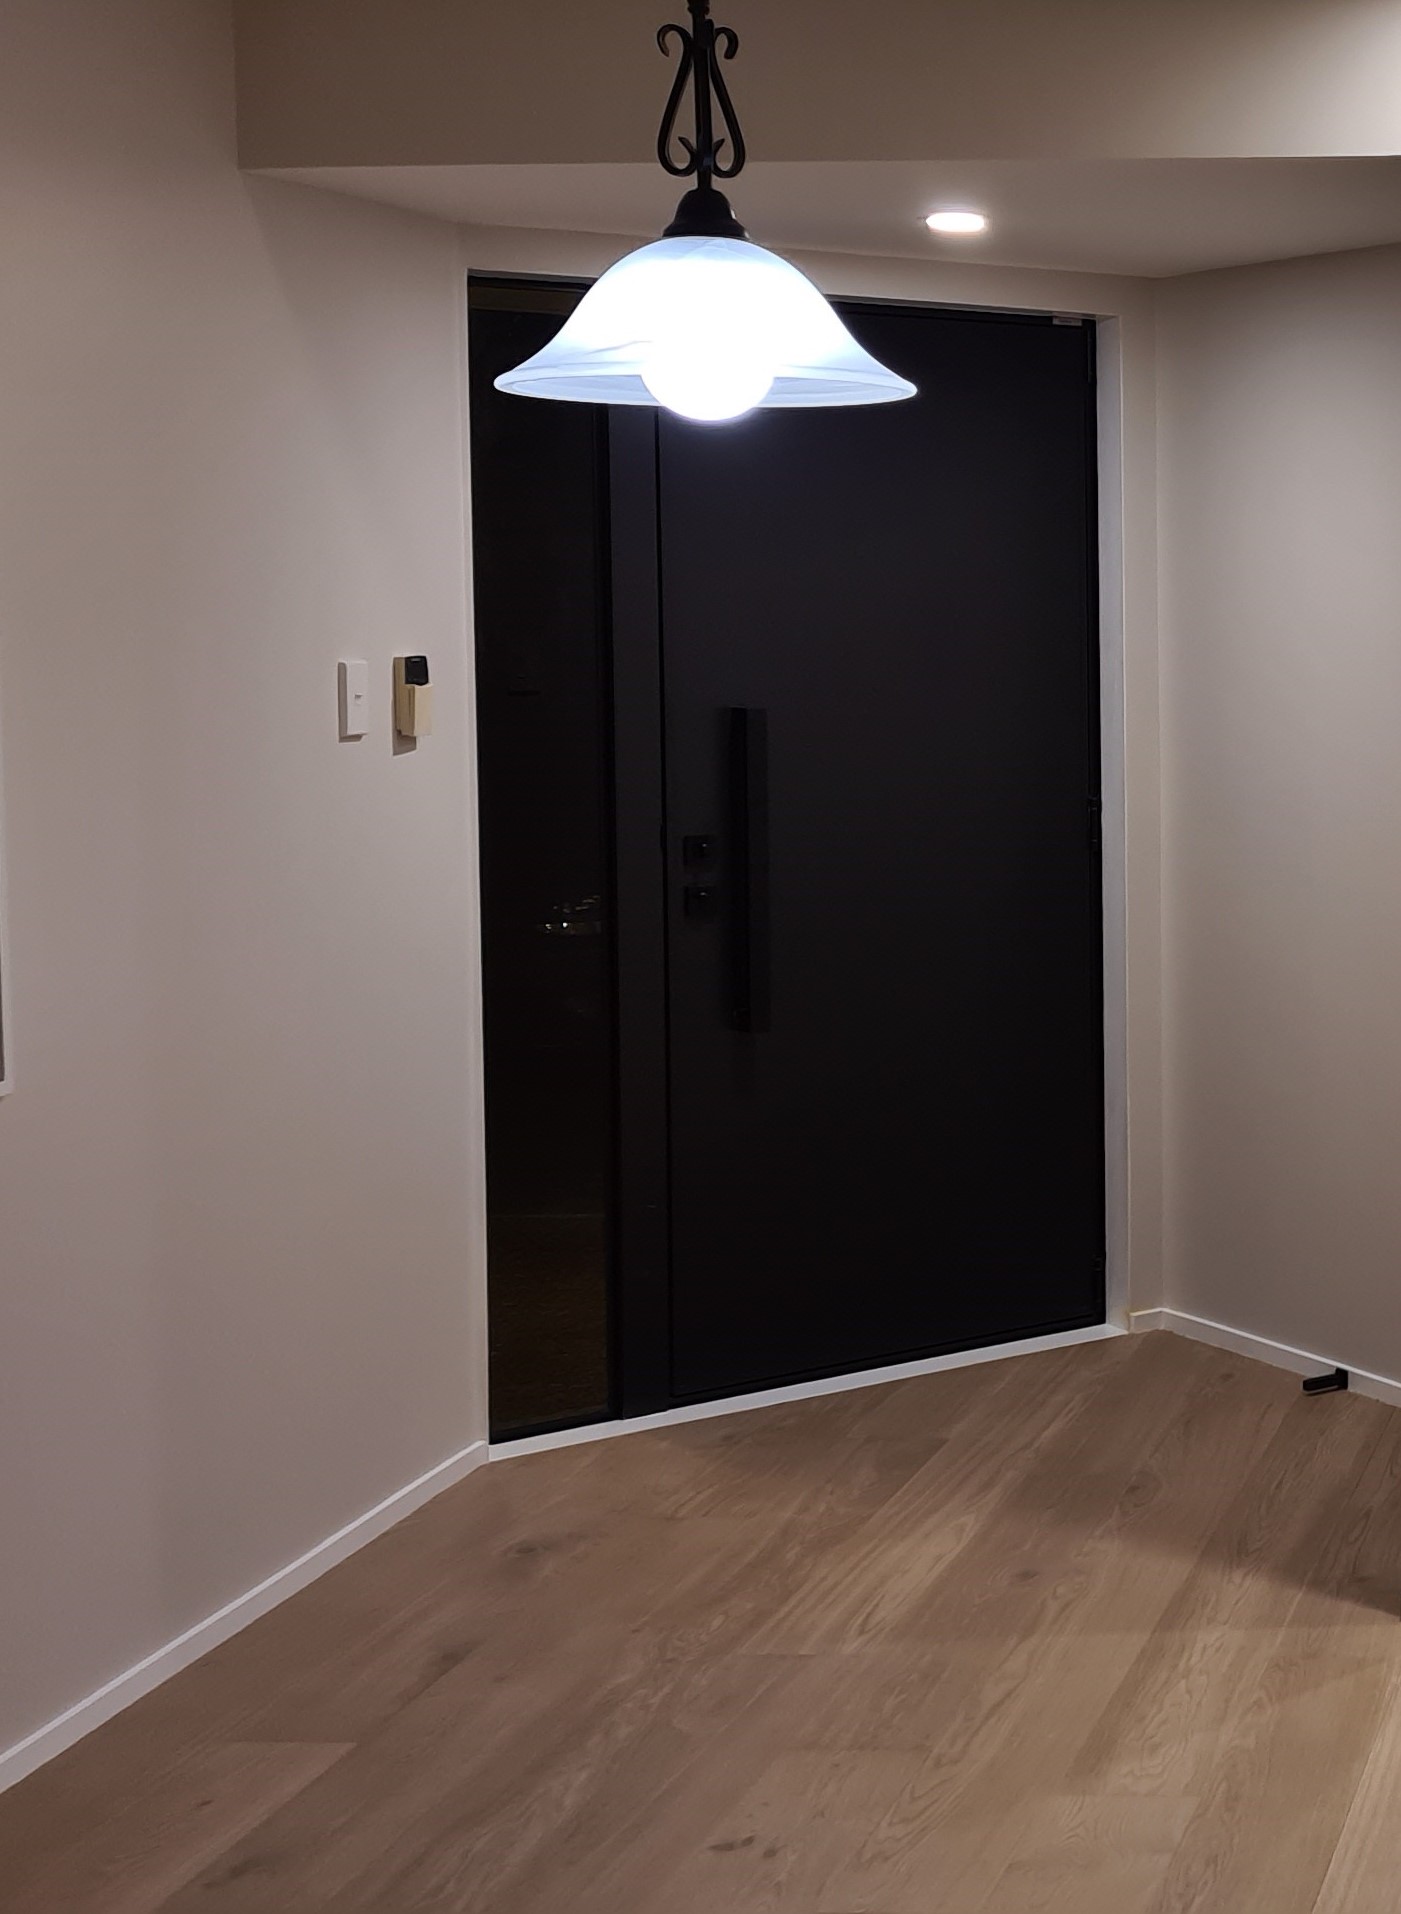
Front door with wooden sill attached
If you plan to have your flooring installed with the front door sill attached then you will need to make sure your builder leaves a 3-5mm gap between the wood floor and the sill to allow for a silicone finishing. The caulking should once again match the colour of the floor or the sill, with the sill painted to match the floor or skirtings.
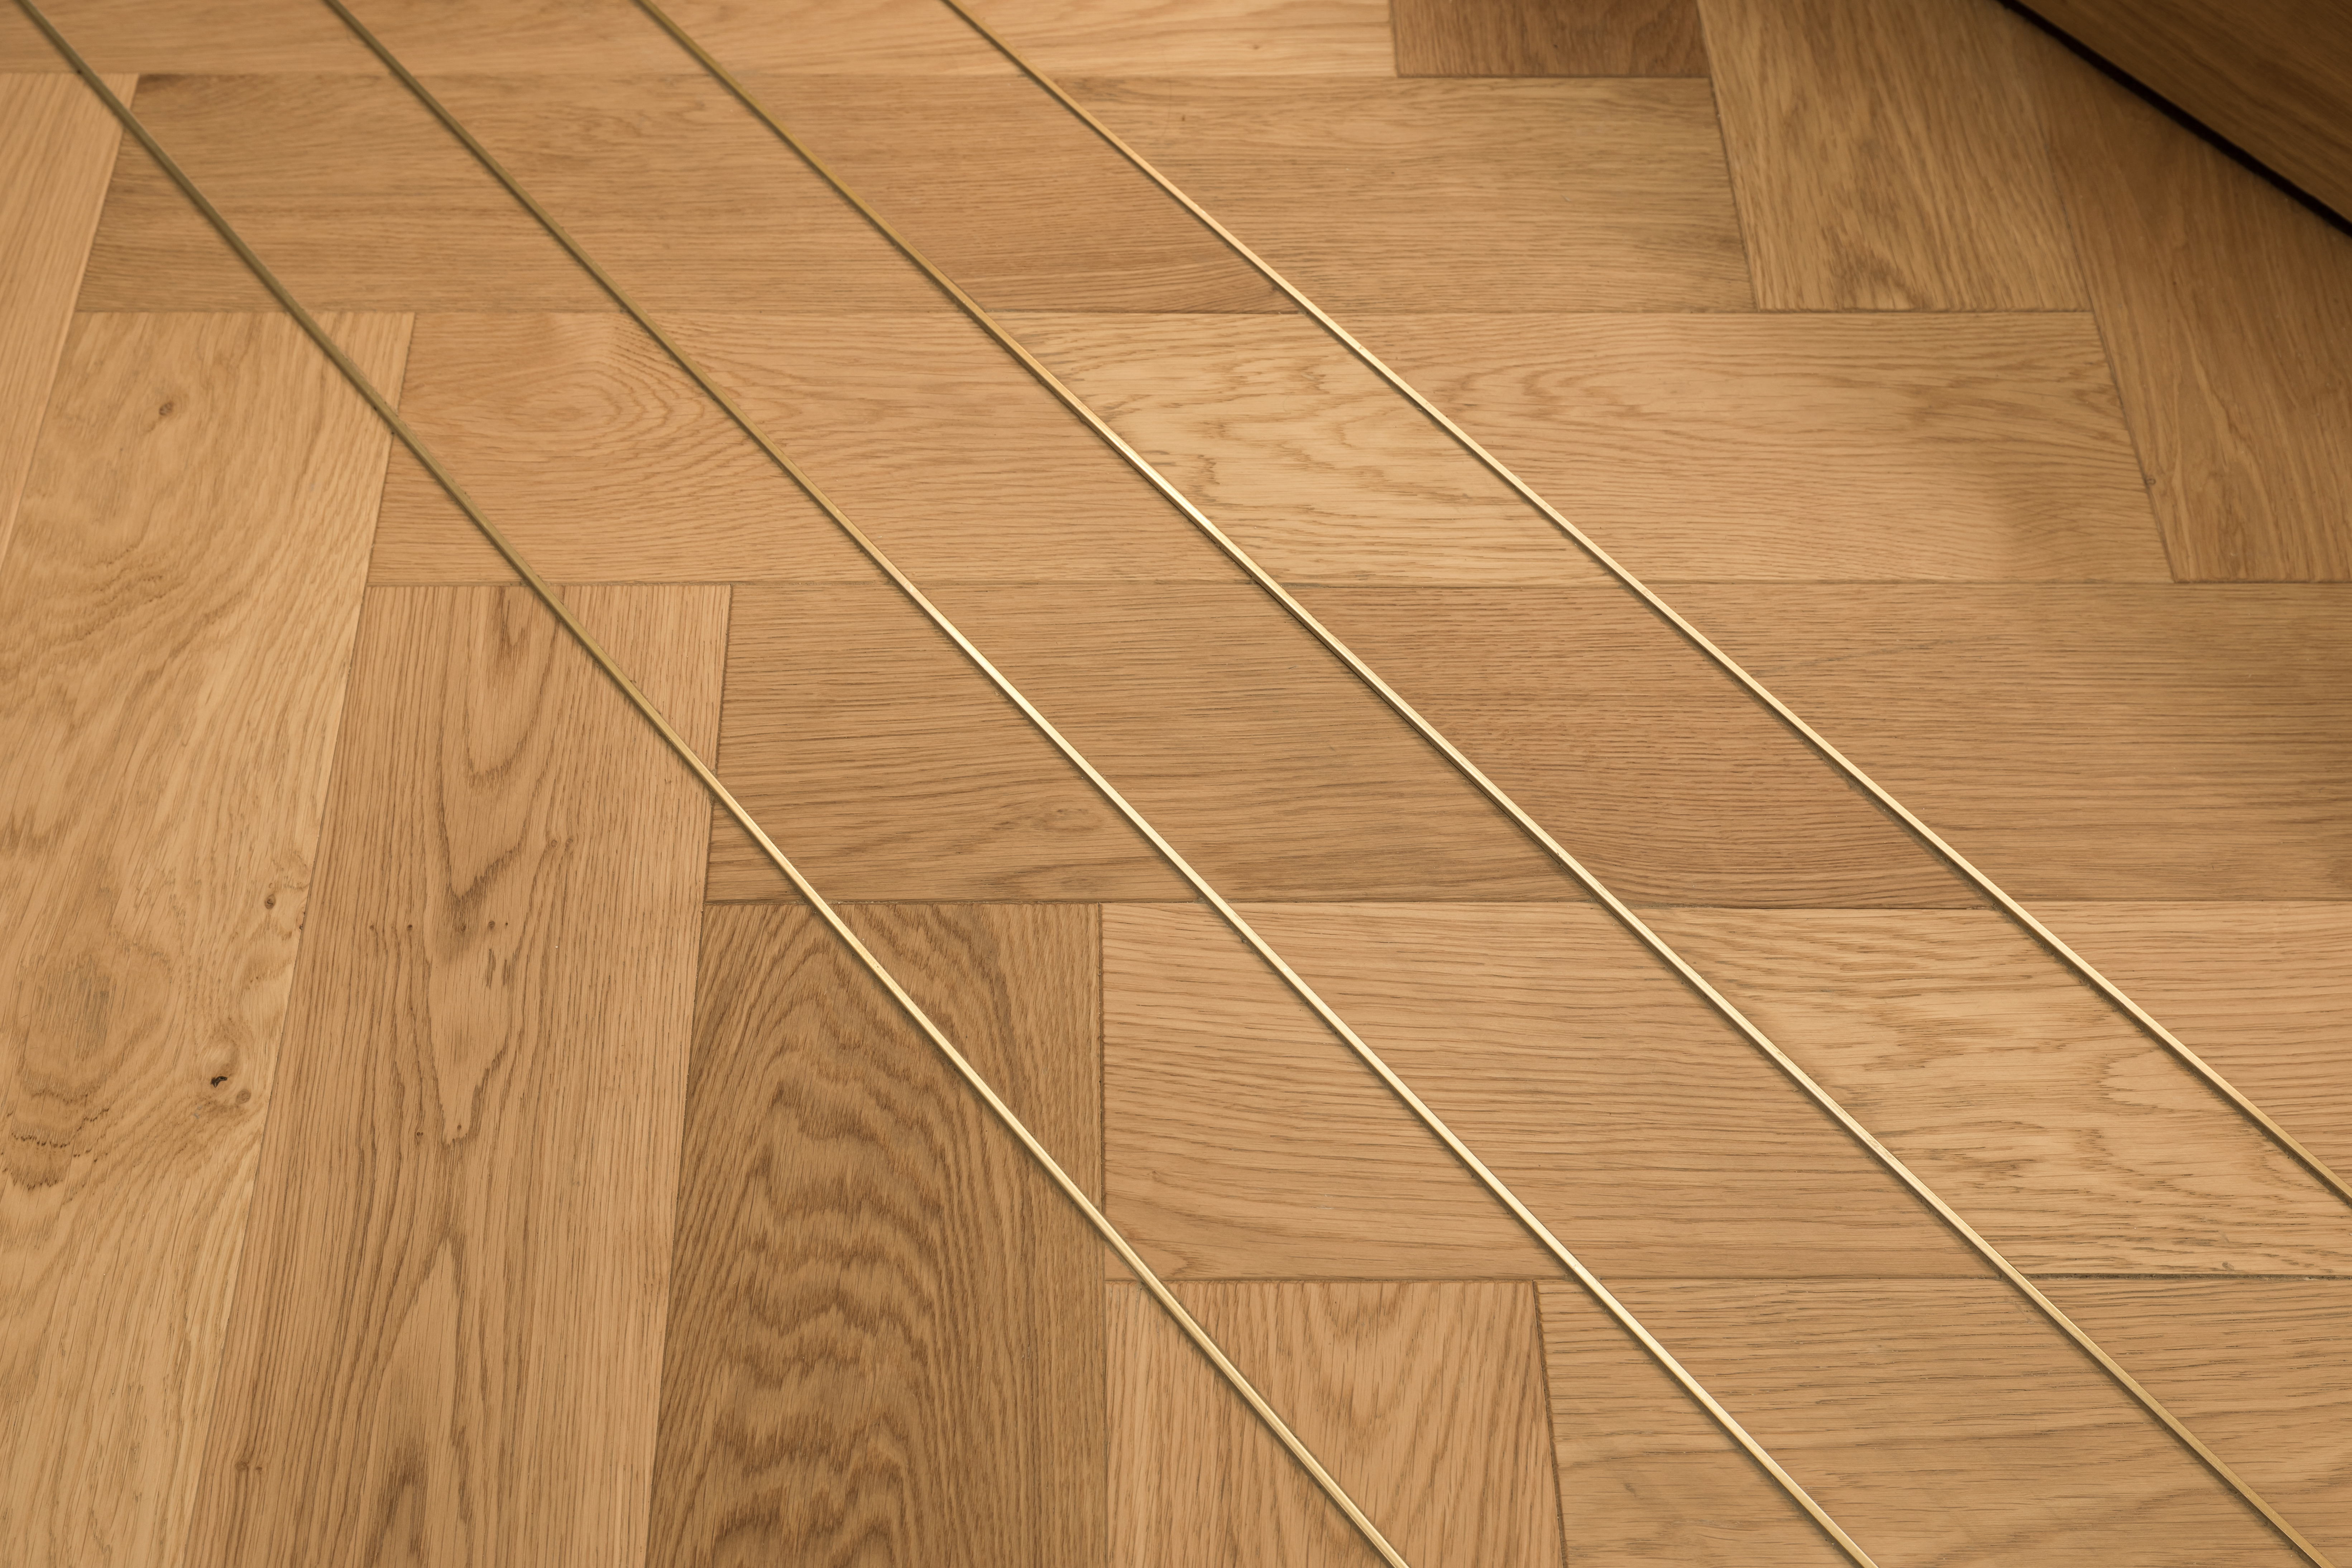
Wood Flooring to Wood Flooring (Border / Direction change)
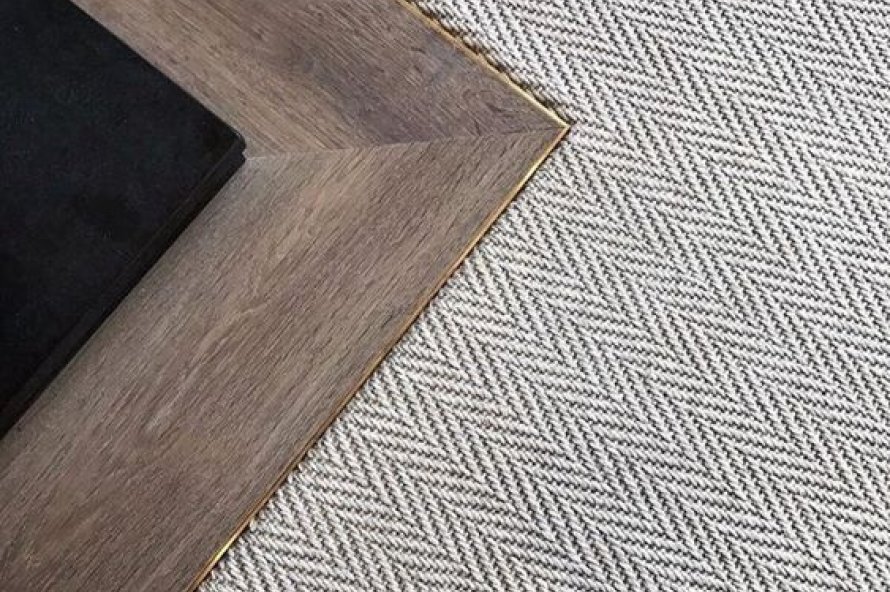
There is something so classically elegant about chevron and herringbone floors, bringing a certain old-world charm to your home with their unique patterns. To create an eye-catching finish to this type of wood flooring technique, you should consider having a border installed around the perimeter of the room.
Wood borders not only look great with patterned flooring but can be functional too. These can be used when the room changes direction and where a break in the floor is needed to allow the flooring to continue to run along the length of the room. Speak to your flooring installer for the best way to achieve this look.
When using an insert such as a border in your flooring installation, we would recommend the use of an extruded flat bar to create a quality finish.
Transition with insert
Adding a extruded flat bar to your flooring takes your wood flooring design to the next level and gives it a professional finish. Once again, when using an insert such as the flat bar, your flooring installer should make sure that the top of the flat bar be set at the same level as the wooden planks, or slightly proud.
Transition without insert
If you are not planning to use an extruded flat bar when adding a border or creating a break in your flooring, then where possible, your flooring installer should use a tongue and groove profile to join the boards together. However, where this is not possible, you should speak to the installer about your options.

If you have any questions about transitions or would like some advice on what flooring transition is right for your project, call our team of experts on 0508 35 66 77, email us at [email protected] or live chat with us on our website.
